To Configure the Schema Document for First Time Use
Each time you
create an
AssetWise Object Type child class, you should
configure the
AssetWise EC schema document. This topic describes
how to configure the schema document for first time use.
- In AssetWise Director, log in to the community.
- From the View menu, select Search.
- In the search type list, select Documents.
- Enter EB_ECPLUGIN_SCHEMA and then click the Search icon.
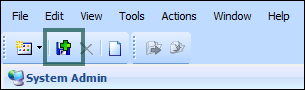
- If an instance appears, select the instance in the tree and delete it by clicking the Delete icon in the Tool bar.
- From the View menu, select System Administration.
- In the tree, expand Documents.
- Expand EB_ECPLUGIN_SCHEMA and select the EB_ECPLUGIN_SCHEMA document class.
- If the Document Class is not Snapshot, then go to Step 10, otherwise go to Step 21:
- Expand the class to display its template.
- Delete the template by clicking the Delete icon in the Tool bar.
- In the System Administration Class tree, select the EB_ECPLUGIN_SCHEMA document class.
- Delete the class by clicking the Delete icon in the Tool bar.
-
Re-generate the WUIF package for this datasource, in order to
re-generate the
AssetWise Class and Template by doing the
following:
- Connect to the AssetWise database server via RDP.
- Open the AssetWise System Management Console.
- Expand the datasources.
- Select your datasource.
- Click Upgrade or Update the Database.
- Clear all database package selections except for the WUIF package.
- Click Start the Database Update and wait for the update to complete.
- Close AssetWise Director and log back in again.
- From the View menu, select System Administration.
- In the Class tree, expand Documents.
- Expand theEB_ECPLUGIN_SCHEMA documents class and select the EB_ECPLUGIN_SCHEMA template.
- Click Show all.
- Confirm that the Revision Rule Set is set to EC_SCHEMA_REVN_RULE_SET, otherwise:
- Set the template Status to NotApproved.
- Expand the template's Snapshot Options.
- In the This Snapshot Template is for list, select Schema (SystemData).
- In the Belonging to the following classes section, select each class and relationship class that you want to include in the EC Schema.
- Select Allow the user to explicitly request the Snapshot creation for this Template.
- In the Auto create the Snapshot section, select On Approval of the Schema (SystemData) and Ignore auto create events when the Snapshot already exists.
- In the Content section, select Header.
- In the Rendition section, select Render to EC.
- In the Other section, select Allow multiple Snapshots to be created from the Template, to be associated with an instance.
- Set the template Status to Approved.
- Save the template.
- From the File menu, select New, then From Template. A new instance of the Snapshot document is created.
- Select the template that you just updated and click Create.
- In the new document instance, click Show all,
- In the Copies section, click New.
- In the Type list, select Master.
- In the Media list, select eB Electronic.
- In the Location list, select Main.
- Click the Add Copy button in the Tool bar, for example,
- In the Copies section, click New.
- In the Copy Number list, select SECONDARY_MASTER.
- In the Type list, select Secondary Master.
- In the Media list, select eB Electronic.
- In the Location list, select Main.
- In the Copies section of the document instance, double-click to open the MASTER copy.
- In EB_ECPLUGIN_SCHEMA Status list, select Approved.